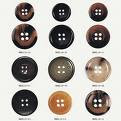
 Everyone loses buttons off garments or fashion accessories, without granny there to sew it back on for you what do you do? Here are a few tips on how to replace the button.
Lay a pin across the top of the button before you start sewing the button on. Once the button has been secured and you’ve completed the job, remove the pin and you will have a button that has a little give.
If you are faced with a a 4-hole button, just work with two holes initially. Once finished cut the thread and then sew the other two holes.
If there is a lot of strain on a garment you can reinforce it by placing a small piece of material formed into a square and put it underneath the button and on top of the garment. This then can be sewn beneath the button to the garment. The square of material should be smaller than the button therefore not be seen as the button should completely hide it. This also helps reinforce the button.
You can seal the threads on the button by painting some nail varnish (clear or opaque) to the top of the threads of the button. This can also be applied to the threads inside the garment. As an alternative, waterproof glue can be used instead.
If you have trouble finding a match of button for your garment as you can paint a button to the required colour if you can find one that is roughly the same size and shape. Use an epoxy type paint when doing this, as this works best.
You can use a variety of material such as dental floss, carpet thread, embroidery floss or fishing line as thread for sewing on buttons garments. These alternative materials are often much better as garments often go through rough treatment. They are a much stronger than ordinary thread and in addition will last much longer.
Sew a button on is quite simple if you give yourself time to do it. Also bear in mind that the simplest sewing kit is just as good as the most expensive!


